How to Create a Kubernetes Cluster on AWS with Kops and Netlify DNS
Hey there, this is my first post. I am going to walk you through some specifics in deploying a Kubernetes Cluster. Before writing this blog post, I have been procrastinating about it but I decided to carry on and finish it, I hope you like it.
Kubernetes Operations(Kops) is a simple and easy way to get Kubernetes Cluster up and
running. It is Production Ready, can be used for upgrades and management of your Kubernetes Cluster.
Netlify is a web hosting infrastructure and automation technology platform. They offer services like CDN, Continuous deployment, 1-click HTTPS, and many more.
Prerequisites
Before we continue, you should have the following:
What’s Next?
Step 1 - Configuring a Domain to Netlify DNS
Login to your Netlify account, go to
Domainsand click onAdd or register domainRegister your domain
Enter your domain
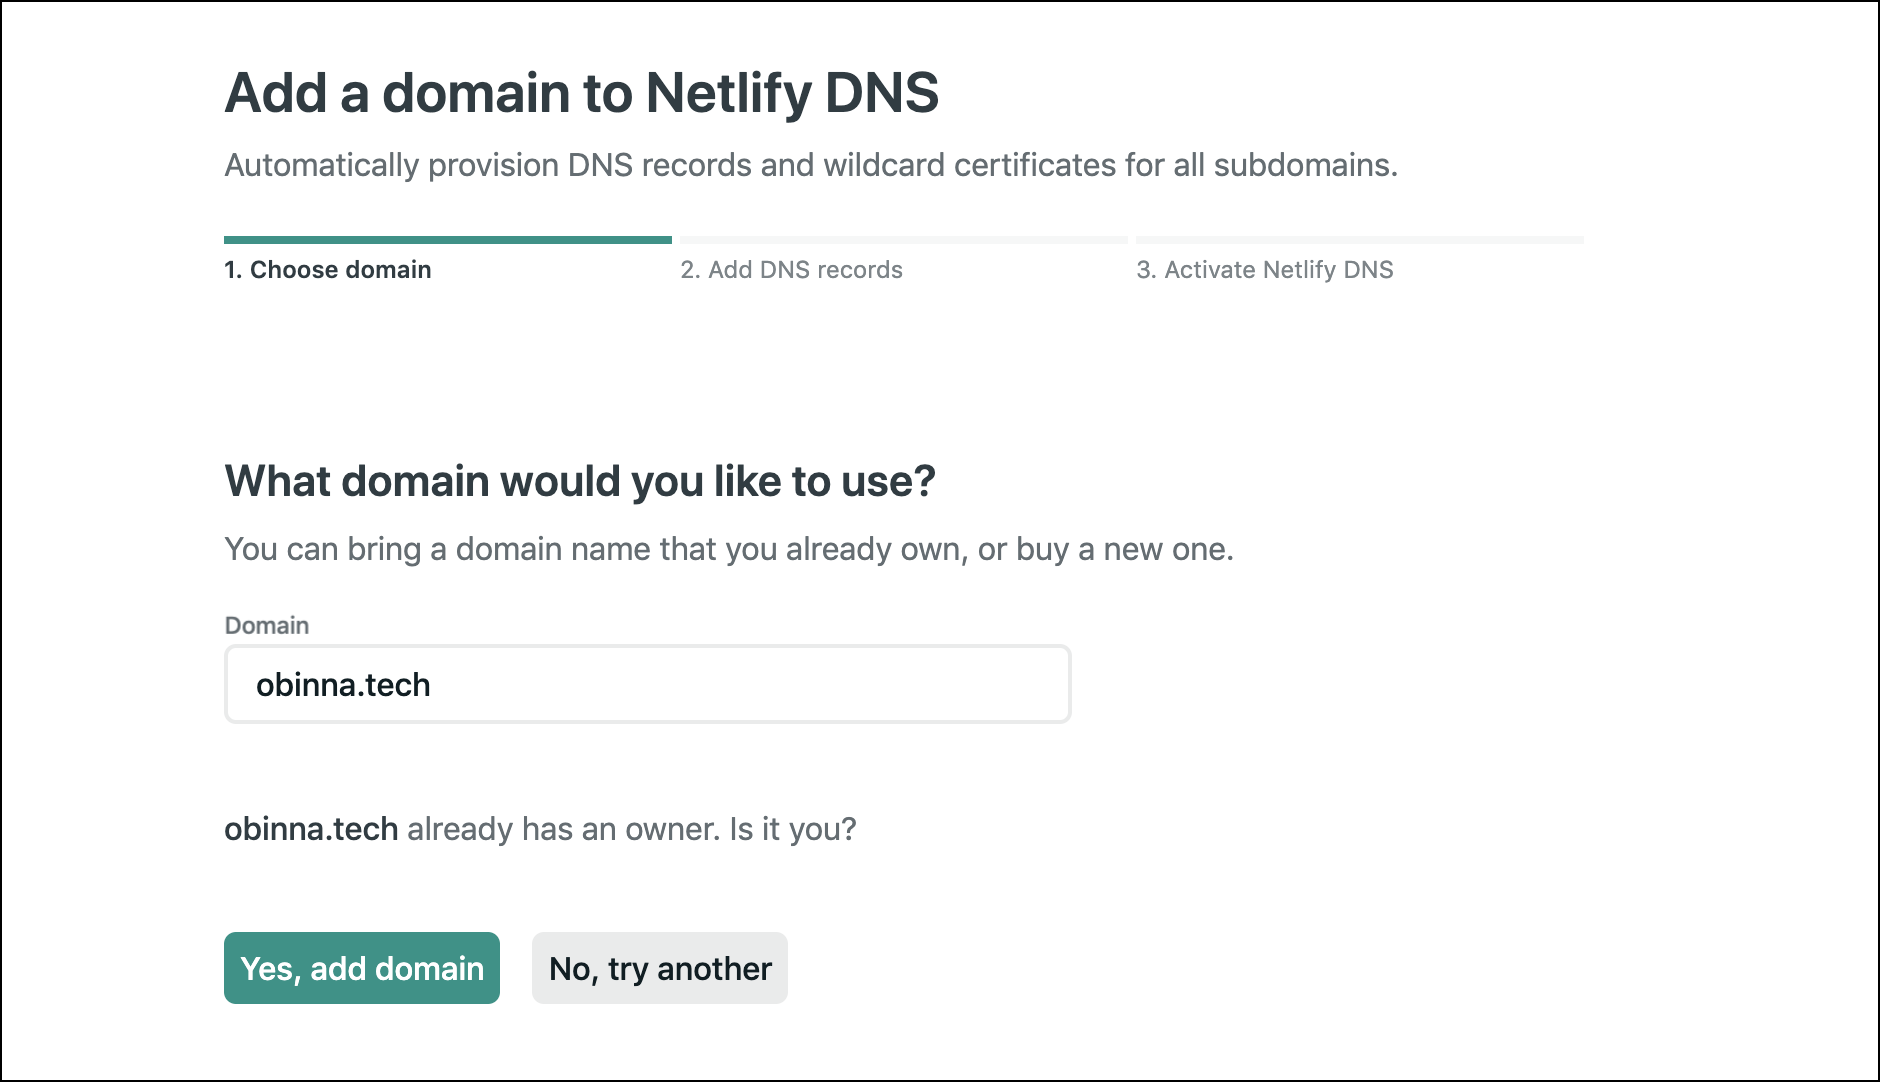
Click on continue

Copy your nameservers from your dashboard

Update it on the domain name registrar

Step 2 - Create and Configure an S3 bucket on AWS using the AWS CLI
You can create an S3 bucket by running:
aws s3api create-bucket --bucket k8.obinna.techSetup versioning for your S3 bucket, this will enable you recover previous versions of the cluster.
aws s3api put-bucket-versioning --bucket k8.obinna.tech --versioning-configuration Status=EnabledExport the S3 bucket as an environment variable
export KOPS_STATE_STORE=s3://k8.obinna.tech
Step 3 - Create a Route 53 hosted zone and Add your DNS record to Netlify
Run this command in your Terminal
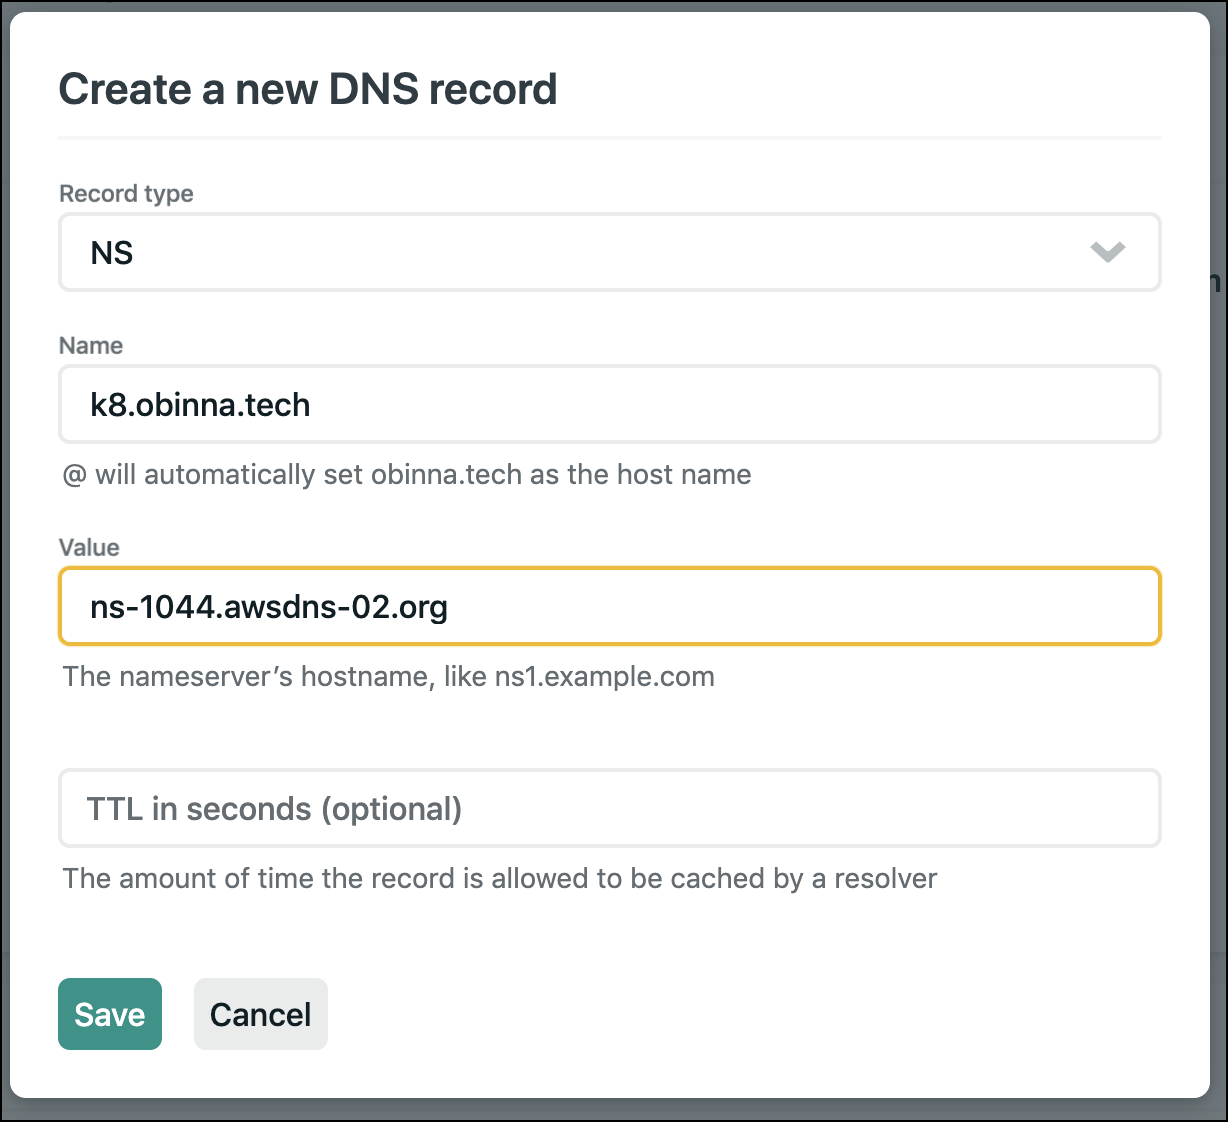
ID=$(uuidgen) && \
aws route53 create-hosted-zone --name k8.obinna.tech --caller-reference $ID | jq .DelegationSet.NameServers
The command above is going to create a hosted zone and then, it will output a set of values that are to be used to create a DNS record for your domain on Netlify.
It gives the following output below:[ "ns-175.awsdns-21.com", "ns-1044.awsdns-02.org", "ns-560.awsdns-06.net", "ns-1732.awsdns-24.co.uk" ]Copy the output and update on your Netlify’s Domain DNS settings dashboard
Update your DNS Record
You should have something like this when you are done

Run a
digcommand to ensure your DNS has propagateddig NS k8.obinna.techThis will show the output below:
;; ANSWER SECTION:
     k8.obinna.tech. 3600 IN  NS ns-175.awsdns-21.com.
     k8.obinna.tech. 3600 IN  NS ns-560.awsdns-06.net.
     k8.obinna.tech. 3600 IN  NS ns-1732.awsdns-24.co.uk.
     k8.obinna.tech. 3600 IN  NS ns-1044.awsdns-02.org.
Ensure you see the output above before going to the next step!
Step 4 - Creating a Kubernetes Cluster with Kops
Run this command to create a Kubernetes Cluster
kops create cluster --name k8.obinna.tech \
--zones us-east-1a  --node-count=3 \
--node-size=t2.medium --master-size=t2.small \
--yes
It gives the following output below when it is done:
Cluster is starting.  It should be ready in a few minutes.
    Suggestions:
     * validate cluster: kops validate cluster
     * list nodes: kubectl get nodes --show-labels
     * ssh to the master: ssh -i ~/.ssh/id_rsa admin@api.obinna.tech
     * the admin user is specific to Debian. If not using Debian please use the appropriate user based on your OS.
     * read about installing addons at: https://github.com/kubernetes/kops/blob/master/docs/operations/ addons.md.
Let us briefly discuss the following flags:
name: This is the name used to create the hosted zone. It is important to pass this in order for kops to communicate with the Route 53 API.zones: This is the availability zone specified for Kops to create the Kubernetes cluster in that region. Always specify a zone in the same region with yourS3 Bucket.node-count: This is the number of worker Nodes you want Kops to create.node-size: This is the size of the AWS EC2 instance which is popularly known asVirtual Machinethat will be used to create the worker nodes.master-size: This is the size of the AWS EC2 instance that will be used as the master node. This is an EC2 instance that will control and send requests to the worker nodes.yes: This is a confirmation flag that allows Kops to go ahead and create the Kubernetes Cluster.
Run this command to see if the Kubernetes Cluster is ready for workload.
kubectl get nodesThis will output the following:
NAME                            STATUS   ROLES    AGE   VERSION
ip-172-20-40-210.ec2.internal   Ready    node     16m   v1.16.9
ip-172-20-43-35.ec2.internal    Ready    node     16m   v1.16.9
ip-172-20-49-102.ec2.internal   Ready    master   18m   v1.16.9
ip-172-20-62-148.ec2.internal   Ready    node     16m   v1.16.9
It takes about 10-15 minutes for the DNS to fully propagate
Step 5 - Deleting the Kubernetes Cluster
kops delete cluster --name k8.obinna.tech --yesYou smashed it!
Big Ups! You were able to create and destroy a Kubernetes cluster. I know it was a long road but you finally made it to end.
If you run into any issues or have suggestions, kindly drop a comment and I will get back to you as soon as possible and don’t forget a drop a response below if you liked this content.
— May 21, 2020
Made with ❤ and on Netlify.